Visualizzazione post con etichetta Victorian Ladies' pastimes. Mostra tutti i post

martedì 30 giugno 2026

Stitching Stories ~ What was a Quilting Bee

“There are times when an idea for a painting will linger for years in my mind before it is ever committed to canvas. I’ve thought about this painting for at least 15 years. It all began when my mother showed me a quilt her grandmother had made as a little girl in the late 1800s. I was amazed by its detail and beauty. I began to research quilt-making and discovered the wonderful American tradition of quilting bees and I knew I had my painting.


“At a quilting bee, women would have family and neighbors gather to finish a quilt. It was a real community event. Often a quilt was made to mark a special occasion, such as a wedding or an upcoming journey. The older, more experienced women would do most of the quilt work, but as in my painting, the less experienced would learn the craft alongside the veterans. The quilt in this painting is the actual quilt my great-grandmother made as a little girl, which made the creative process all the more personal for me.” (Morgan Weistling, painter of THE QUILTING BEE)
 The origin of “bee” comes from the dialectal word 'been' or 'bean' (meaning "help given by neighbours") and a Quilting Bee started out as an important means of socializing for colonial and pioneer women.  
 In the rural South, especially in the 19th and early 20th centuries, quilting wasn't just a hobby, it was a household necessity. Winters were cold and families needed warm bedding. Buying new blanket wasn't always possible, so quilt were made from what was on hand. But even in hardship, these women infused their quilts with artistry and pride. Popular quilting patterns like "Log Cabin", "Double Wedding Ring" and "Flying Geese" weren't just lovey, they carried meaning, symbolism and personal stories. A Quilting Bee was a special space for women, and for women only, it was one of the few socially spaces where women could gather without men. It was a precious opportunity to step away from daily chores and come together in a circle of friendship and support: as their hand worked, so did their voices, swepping recipes, offering advice, grieving losses, celebrating births, and passing down family stories. In this way, Quilting Bees helped preserving oral histories, folk knowledge and cultural traditions, that would, otherwise, have been lost.


 As Morgan Wiestling wrote as a caption of his painting, older women passed down their skills to daughters, granddaughters, nieces, teaching not only sewing techniques, but also values like patience, and pride in one's work. We could say that these gatherings were informal schools of craftsmanship. It wasn't uncommon that a quilt was made for a special purpose: church groups and women's associations organized quilting bees to raise founds or donate quilts to soldiers, family in need, orphans or the sicks. 
I mentioned soldiers, and in fact the golden moment of Quilting Bees was linked to the Civil War.


QUILTING BEE by Henry Mosler.


Even before 1830, abolitionists were working hard to end slavery. One way they did this was to hold grand fairs to raise both awareness and money for the abolitionist cause. Quilts were one of many craft pieces sold at these fairs. These quilts were usually fine quilts often with beautiful appliqué. Women sometimes put anti-slavery poems and sayings on the quilts they made for fairs as well as for friends and family. The goal was to show the terrible plight of the slaves.
During the Civil War women on both sides were very active in raising money for the war effort and making quilts and other bed coverings for soldiers. In the North, quilts were still made for fairs but now these fairs earned money to support needs that came about because of the war. In the South, "gunboat" quilts were made to pay for much-needed gunboats. It wasn't long before it was obvious that soldiers on both sides would need blankets and quilts for warmth. In the North, women either made quilts or remade quilts from bed coverings. Since the cots were narrow, two bedspreads could be made into three quilts for soldiers. The United States Sanitary Commission was in charge of collecting and distributing them.
In the South, quilt-making was more difficult because although cotton was grown in the south, it was manufactured into fabric in the north. Before long, fabric was almost impossible to obtain so women had to spin and weave before they could sew a bed covering together. Regardless of their construction, most of the quilts made for soldiers on either side were made with practical patterns and fabric. Due to heavy use, very few have survived to our days, alas!


Today too our time has come to its end . . . 
Once again,
let me wish You All all my best, 
with sincere gratitude 
both for Your interest and Your affection. 
See you soon ❤


Dany


 ~ Storie cucite sul tessuto ~
Cosa era un Quilting Bee

«A volte, l'idea per un dipinto mi frulla in testa per anni prima di essere finalmente trasferita su tela. Ho pensato a questo quadro per almeno 15 anni. Tutto è iniziato quando mia madre mi ha mostrato una trapunta che sua nonna aveva realizzato da bambina alla fine del XIX secolo. Sono rimasto colpito dalla sua cura dei dettagli e dalla sua bellezza. Ho iniziato a documentarmi sulla realizzazione delle trapunte e ho scoperto la meravigliosa tradizione americana dei "quilting beess", e ho capito di aver trovato il soggetto perfetto per il mio dipinto.


IMMAGINE DI COPERTINA - THE QUILTING BEE di Morgan Weistling.


«Durante un "quilting bee", le donne si riunivano con familiari e vicine di casa per finire una trapunta. Era un vero e proprio evento comunitario. Spesso una trapunta veniva realizzata per celebrare un'occasione speciale, come un matrimonio o un viaggio imminente. Le donne più anziane ed esperte si occupavano della maggior parte del lavoro, ma, come nel mio dipinto, le meno esperte imparavano il mestiere insieme alle veterane. La trapunta in questo quadro è proprio quella che la mia bisnonna realizzò da bambina, il che ha reso il processo creativo ancora più personale per me.» (Morgan Weistling, pittore di THE QUILTING BEE).
L'origine del termine "bee" deriva dalla parola dialettale "been" o "bean" (che significa "aiuto offerto dai vicini") e le riunioni di cucito (Quilting Bee) iniziarono come un importante mezzo di socializzazione per le donne delle colonie e pioniere.
Nel Sud rurale, soprattutto nel XIX e all'inizio del XX secolo, il quilting non era solo un hobby, ma una necessità domestica. Gli inverni erano freddi e le famiglie avevano bisogno di coperte calde. Acquistarne una nuova non era sempre possibile, quindi le trapunte venivano realizzate con ciò che si aveva a disposizione. Ma anche nelle difficoltà, queste donne infondevano nelle loro trapunte arte e orgoglio. I motivi più popolari, come "Log Cabin", "Double Wedding Ring" e "Flying Geese", non erano solo belli, ma portavano con sé significato, simbolismo e storie personali. Il Quilting Bee era uno spazio speciale per le donne, e solo per loro, uno dei pochi spazi sociali in cui le donne potevano riunirsi senza uomini. Era una preziosa opportunità per allontanarsi dalle faccende quotidiane e ritrovarsi in un cerchio di amicizia e sostegno: mentre le loro mani lavoravano, così facevano le loro voci, scambiandosi ricette, offrendo consigli, condividendo il dolore per le perdite, celebrando le nascite e tramandando storie di famiglia. In questo modo i Quilting Bees hanno contribuito a preservare le storie orali, le conoscenze popolari e le tradizioni culturali che altrimenti sarebbero andate perdute.


IMMAGINE 2 - Fotografia di un "quilting bee" di fine Ottocento.


Come Morgan Wiestling ha scritto a didascalia del suo dipinto, le donne anziane tramandavano le loro abilità a figlie e nipoti, insegnando non solo le tecniche di cucito, ma anche valori come la pazienza e l'orgoglio per il proprio operato. Potremmo dire che questi incontri erano delle vere e proprie scuole informali di artigianato. Non era raro che una trapunta venisse realizzata per uno scopo specifico: gruppi parrocchiali e associazioni femminili organizzavano incontri di cucito per raccogliere fondi o donare trapunte ai soldati, a famiglie bisognose, a orfani o a malati. Ho menzionato i soldati, e in effetti il ​​momento d'oro dei Quilting Bees è legato alla Guerra di Secessione Americana.


IMMAGINE 3 - QUILTING BEE di Henry Mosler.


Già prima del 1830, gli abolizionisti si adoperavano per porre fine alla schiavitù. Un modo in cui lo facevano era organizzare grandi fiere per sensibilizzare l'opinione pubblica e raccogliere fondi per la causa abolizionista. Le trapunte erano uno dei tanti manufatti venduti in queste fiere. Si trattava solitamente di trapunte pregiate, spesso con bellissime applicazioni. Le donne a volte incidevano poesie e aforismi contro la schiavitù sulle trapunte che realizzavano per le fiere, così come per amici e familiari. L'obiettivo era mostrare la terribile condizione degli schiavi.
Durante la Guerra Civile, le donne di entrambi gli schieramenti furono molto attive nella raccolta fondi per lo sforzo bellico e nella realizzazione di trapunte e altre coperte per i soldati. Al Nord, le trapunte venivano ancora prodotte per le fiere, ma ora queste fiere raccoglievano fondi per sostenere le esigenze sorte a causa della guerra. Al Sud, venivano realizzate le "trapunte delle cannoniere" per finanziare l'acquisto delle cannoniere, di cui vi era un disperato bisogno. Non passò molto tempo prima che diventasse evidente che i soldati di entrambi gli schieramenti avrebbero avuto bisogno di coperte e trapunte per riscaldarsi. Al Nord le donne realizzavano trapunte o le riadattavano utilizzando le coperte da letto. Poiché le brande erano strette, due coperte potevano essere trasformate in tre trapunte per i soldati. La Commissione Sanitaria degli Stati Uniti se ne occupava della raccolta e della distribuzione.
Al Sud la realizzazione di trapunte era più difficile perché, sebbene il cotone fosse coltivato soprattutto lì, veniva trasportato al Nord dove diventava tessuto. Ben presto il tessuto divenne quasi introvabile, quindi le donne dovettero filare e tessere prima di poter cucire insieme una coperta. Indipendentemente dalla loro fattura, la maggior parte delle trapunte realizzate per i soldati di entrambi gli schieramenti erano fatte con modelli e tessuti pratici. Purtroppo, a causa dell'uso intensivo, pochissime sono giunte fino a noi.


Anche oggi il nostro tempo è giunto al termine . . .
Permettetemi, ancora una volta,
di augurarVi ogni bene,
con sincera gratitudine 
sia per il Vostro interesse che per il Vostro affetto!
A presto ❤


Dany


LINKING TO:


Angie @ God's Growing Garden has chosen this post to feature today, July 7, 2026.
I'm overflowing with joy, thank you sweet lady for such a honour!


martedì 15 novembre 2022

VICTORIAN LADIES' WORKS OF ART: Making Jewels with Hair


If you do reflect upon it, nothing lasts forever...

Sometimes a love ends,

sometimes a friendship fades away...

How many bonds can deteriorate.

But cut a lock of hair to the person you love,

and it will keep its color, her light for decades,

indeed, even for centuries. 


The Victorians taught us that. In fact, the art of working human hair, one of the many traditions of the XIXth century, has come down to us as if it had remained frozen in time. And My Little Old World has already mentioned it to you by discussing, some time ago, the importance that, in the collective imagination, female hair had in the Victorian era, so much so that, if their robustness allowed it, they were not cut for a whole life.


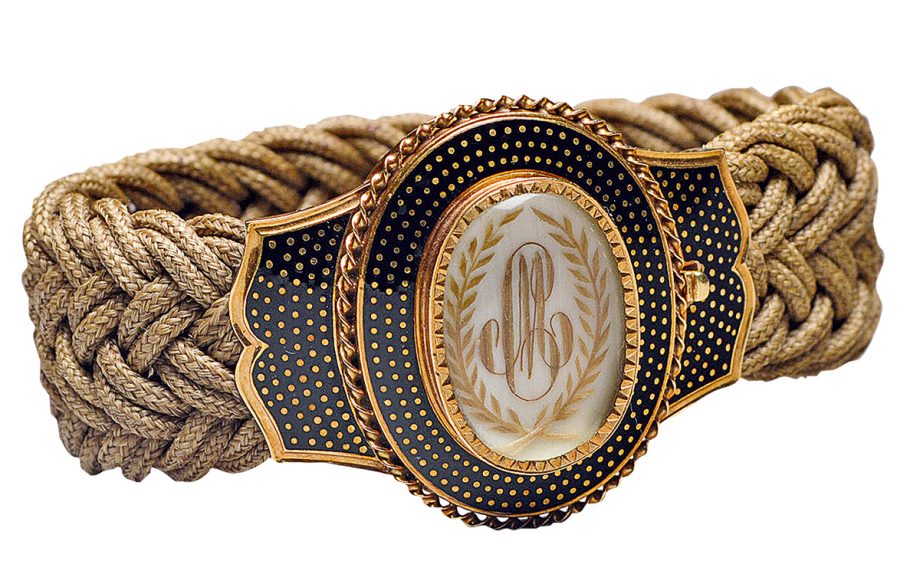
Back then, locks of hair were wisely woven into jewels, wrapped around themselves to resemble flower petals, even ground to be used in pigments and what we find ourselves today to confront with are authentic masterpieces made to defeat the laws of existence. The hair of a loved one, and who had been lost, was preserved as a memento mori already during the Shakespearean period and probably from well before eras. In fact, in some Egyptian tombs there are frescoes that seem to represent scenes in which pharaohs and queens exchange locks of hair as a sign of love. From 1600-1700 a sort of cult, aimed at preserving the memory of deceased loved ones, began: at that time infant mortality was very high, but also that of adults reached exorbitant numbers. And making personal objects, especially jewelry, with locks of their hair, gradually became a custom. But in the Victorian era, this art, which became more and more widespread and practiced, was mainly aimed at making paintings with family trees, objects to be exchanged as a token of love or friendship, frames for portraits, etc. using the hair of people who were still alive. It was not unusual that to be wowen were hair of different colors because it belonged to different people, perhaps united by a family bond: for example, a gift given to a father by three daughters of his. It could also have been a simple bookmark, but to insert it in a journal assumed the meaning of having with you the true essence of who had donated that hair. In the image below, a tree represents an American Methodist congregation: the shoots covering the branches are made with the hair of each member who was part of it.


From the collection of John Whitenight and Frederick LaValley. Photo by Alan Kolc. Courtesy of the College of Physicians of Philadelphia and the Mütter Museum


And here they are some other jewels and a framed drawing to hang to a wall belonging to private collections.


It is likely that they were, above all, the Victorian ladies who devote themselves to this art, which today appears so unusual to us and which reached the peak of its diffusion around 1850; probably it was a parlor pastime, as it was making wax flowers (click HERE to read the post that My Little Old World dedicated to this topic), to embroider, to sew, to create photocollages (click HERE to read the post that My Little Old World dedicated to this topic). But among all the artistic works mentioned, the one who worked human hair was certainly the most particular, that which required much skillness and that only high-ranking people could afford: not everybody could buy what it was needed and, let's remember it, many were the women who had to work to support their families and certainly they had no way to think about leisure.

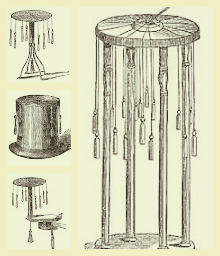
To wrap the strands of hair it was necessary to have a working table with a circular base that had to meet certain requirements. In reality there were several types of braiding tables: one was made in the shape of a pouf and was named ladies' table; it could be used while seated, but often cluttered to the point of hindering the lady who was sitting beside. The other had longer legs and was a full-fledged perch table, but it was more inconvenient to work on it because you had to lean forward. There was still another, the smallest one, which had to be anchored to a side of a table. But there were also those ladies who were clever enough to simply use an inverted cylindrical container, or a hat, on the bottom of which, in the center, they had made a hole; various pieces of twine branched off from it as many as they were required by the pattern they'd chosen, and the strands were tied to them. At the head of each piece of twine they were tied wooden shuttles or lead weights to use them easily. Finally, special patterns, collected in catalogs or manuals, were a valid help to create these very complex artistic objects. The image below represents the cover of the best known, and probably most used one, dating back to 1870.


A. Bernhard & Co. Catalogue, 1870 Manufacturers of Diamond Work & Ornamental Hair Jewelry importers of German Jewelry, Watches, Diamonds, etc.etc.
169 Broadway, Gilsey Building, Rm. 3 New York


But the more sophisticated families and the less industrious ladies went to real artisans who had handed down this art for generations. Unfortunately the names of the various artists have not reached us and all the works that have been preserved are anonymous.
The first thing to do was to prepare the hair strands by properly cleansing them following some instructions with much care. The following are taken from a 1850s serie of issues of The Godey’s Lady’s Book: 

“Sort the tress, which is about to be used, into lengths, tie the ends firmly and quite straight with pack thread, put the hair into a small saucepan with about a pint and a half of water, and a piece of soda of the size of a nut, and boil it for a quarter of an hour or twenty minutes; take it out, shake off the superfluous moisture, and hang it up to dry, but not near a fire.”

“When it has become perfectly dry, divide it into strands containing from twenty to thirty hairs each, according to the fineness of the hair or the directions given for the pattern about to be worked. It must be observed that every hair in the strand should be of the same length, and the strands should be all of an equal length.” 

"Knot each end of each strand, then take the requisite number of leaden weights, weighing about three quarters or half an ounce each, and affix about a quarter of a yard of pack thread to each of them; lay them down side by side on the table, and to the other ends of the pack thread affix the strands of hair already prepared, knotting them on with a weaver's or sailor's knot; care must be taken all this time to prevent any entanglement or derangement of the hair."

"The other ends of the strands must now be gathered together, firmly tied with pack thread, and then gummed with a cement composed of equal parts of yellow wax and shellac melted together and well amalgamated, and then rolled into sticks for use. We now come to the table and the arrangement of the strands on it."

And thus had come the time to proceed following the creativity or the chosen models, letting oneself be guided by the patterns.


Here you are some pages from the A. Bernhard & Co. Catalogue, 1870 Manufacturers of Diamond Work & Ornamental Hair Jewelry representing some models of jewels or small keepsakes in hair


I don't go into the descriptive details of every single pattern because they look like real puzzles just reading them; I limit myself to publishing some images and just the starting indications, always taken from the same issues of The Godey's Lady's Book, so that you can at least realize what these ladies of ours were capable of:


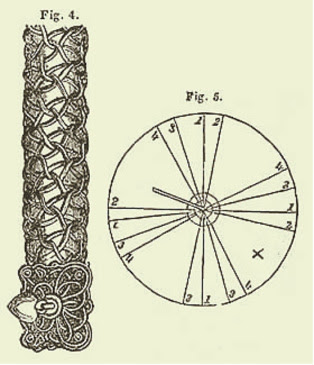
A PATTERN FOR A BRACELET (Fig. 4.)

"Sixteen strands of twenty-five or thirty hairs each, according to the fineness of the hair. For this pattern the strands must be arranged in fours, and numbered."


CHAIN OR GUARD PATTERN (Fig. 6.)

"Ten strands only, of about twenty hairs each, are required for this. They must be arranged thus."


A PATTERN FOR A CHAIN OR A GUARD (Fig. 2.)

"For this pattern, sixteen strands, each consisting of about twenty hairs, are required. These must be arranged in pairs on the circle on the table, at equal distances, and so that the opposite pairs shall be in direct lines with each other."


And I'm stopping here, Victorian ladies were much more patient and ingenious than us, that's sure! But it must be said that they could afford to devote much more time to leisure than we can dedicate to it today, perhaps this is what we lack most, alas!


Thanking you with all my heart for following me up to here,
I'm giving you an appointment at the next post,
while sending you much love.
See you soon ❤  


LE OPERE D'ARTE REALIZZATE DALLE LADIES VITTORIANE: Gioielli creati con capelli veri


IMMAGINE 1 - Orecchini fatti con capelli veri montati su oro

Se ci pensate bene, nulla dura per sempre...

Talvolta finisce un amore,

talvolta si logora un'amicizia...

Quanti legami possono deteriorarsi.

Ma tagliate una ciocca di capelli alla persona che avete cara,

ed essa manterrà il suo colore, la sua luce per decenni,

anzi, persino per secoli.


Ce lo hanno insegnato i Vittoriani. Infatti l'arte che lavorava capelli umani, una delle numerose tradizioni del XIX° secolo, è giunta fino a noi come fosse rimasta congelata nel tempo. E My Little Old World ve ne ha già fatto cenno trattando, tempo fa, dell'importanza che, nell'immaginario collettivo, avevano, in epoca vittoriana, i capelli femminili tanto che, se la loro robustezza lo consentiva, non si tagliavano per una vita intera. 


IMMAGINE 2 - Lady vittoriana con la sua lunga chioma


A quel tempo ciocche di capelli venivano sapientemente intrecciate in gioielli, avvolte su sé stesse per assomigliare a petali di fiori, persino macinate per essere utilizzate in pigmenti e ciò con cui ci troviamo a confrontarci oggi  sono autentici capolavori realizzati per sconfiggere le leggi dell'esistenza. I capelli di una persona amata, e che si era perduta, erano conservati come memento mori già a partire dal periodo shakespeariano e probabilmente da epoche ben antecedenti. In alcune tombe egizie si trovano, infatti, affreschi che sembrano rappresentare scene in cui faraoni e regine si scambiano ciocche di capelli in segno d'amore. Dal 1600-1700 prese avvio una sorta di culto volto a preservare il ricordo dei cari deceduti: allora era altissima la mortalità infantile, ma anche quella degli adulti raggiungeva cifre esorbitanti. E fabbricare oggetti personali, soprattutto gioielli, con ciocche della loro chioma, divenne a poco a poco una consuetudine. Ma in epoca vittoriana, questa arte che divenne sempre più diffusa e praticata, era più che altro volta a fabbricare quadri con alberi genealogici, a confezionare oggetti da scambiare come pegno d'amore o d'amicizia, ad incorniciare ritratti, etc. utilizzando chiome di persone ancora in vita. Non era inusuale che venissero intrecciati capelli di colori differenti perché appartenenti a persone diverse, magari unite da un legame di parentela: per esempio un dono fatto ad un padre da tre figlie. Poteva anche trattarsi di un semplice segnalibro, ma inserirlo in un diario personale assumeva il significato di avere con sé la vera essenza di chi aveva donato quei capelli. Nell'immagine qui sotto un albero rappresenta una congregazione metodista americana: i germogli che ne rivestono i rami sono fatti con i capelli di ciascun membro che ne faceva parte.


IMMAGINE 3 - Dalla collezione di John Whitenight e Frederick LaValley. Fotografia di Alan Kolc. Courtesy of the College of Physicians of Philadelphia and the Mütter Museum


Ed eccovi altri monili ed un disegno incorniciato e da conservare appeso ad una parete come ornamento che fanno parte di collezioni amatoriali.


IMMAGINI 4-5-6-7-8-9


Si suppone che a dedicarsi a quest'arte, che oggi ci appare così inconsueta e che raggiunse il culmine della sua diffusione attorno al 1850, fossero soprattutto le ladies vittoriane e che si trattasse di un passatempo da salotto, così come lo erano fabbricare fiori di cera (clicca QUI per leggere il post che all'argomento ha dedicato My Little Old World), ricamare, cucire, creare photocollages (clicca QUI per leggere il post che all'argomento ha dedicato My Little Old World).
Ma tra tutti quelli menzionati, quello che lavorava capelli umani era di sicuro il lavoro artistico più artificioso e che potevano permettersi solamente persone altolocate, non fosse altro per ciò di cui ci si doveva munire per realizzare intrecci di ogni tipo. Non tutti potevano acquistare ciò che occorreva e, ricordiamolo, molte erano le donne che dovevano lavorare per sostentare la propria famiglia e non avevano di certo modo di dedicarsi ad occupazioni dilettevoli.


IMMAGINE 10 A SINISTRA - Esempi dei vari tavoli da lavoro utilizzati per intrecciare capelli


Per avvolgere su sé stessi i capelli era necessario munirsi di un tavolino da lavoro con base circolare che doveva rispondere a determinati requisiti. In realtà ne esistevano diversi tipi: uno era fatto a forma di pouf e veniva chiamato ladies' table - tavolino per signore; poteva essere utilizzato stando seduti, ma spesso ingombrava al punto da impicciare la dama che era seduta accanto. L'altro aveva gambe più lunghe ed era un tavolino fatto a trespolo a tutti gli effetti, ma era più scomodo lavorarvi perché si doveva stare protratti in avanti. Un altro ancora, il più piccolo, veniva ancorato su di un lato di un tavolo. Ma vi era anche chi si ingegnava ed usava semplicemente un contenitore cilindrico rovesciato, o un cappello, sul cui fondo, al centro, aveva praticato un foro; da esso si diramavano i vari fili di spago, cui venivano legate le ciocche di capelli, a capo dei quali erano fissate delle navette in legno o pesi di piombo per impugnarli agevolmente. Appositi schemi erano, infine, un valido aiuto per realizzare questi oggetti artistici così tanto complessi, ed erano raccolti in cataloghi o manuali. L'immagine riportata di seguito rappresenta la copertina di quello più noto, e probabilmente il più utilizzato, risalente al 1870.


IMMAGINE 11 - A. Bernhard & Co. Catalogue, 1870 Manufacturers of Diamond Work & Ornamental Hair Jewelry importers of German Jewelry, Watches, Diamonds, etc.etc.,169 Broadway, Gilsey Building, Rm. 3 New York


Ma le famiglie più sofisticate e le ladies poco operose si rivolgevano a veri e propri artigiani che si tramandavano questa arte da generazioni. Purtroppo i nomi dei vari artisti non sono pervenuti a noi e  tutte le opere che si sono conservate sono anonime.
La prima cosa da fare era preparare le ciocche di capelli detergendole adeguatamente seguendo scrupolosamente alcune istruzioni. Le seguenti sono tratte da alcuni numeri del  del Godey's Lady's Book risalenti agli anni '50 del 1800:

"Separare la treccia, che sta per essere utilizzata, in lunghezze, legare le estremità saldamente e abbastanza dritte con filo da impacco, mettere i capelli in una piccola casseruola con circa mezzo litro d'acqua e un pezzo di soda della dimensione di una noce e fare bollire per un quarto d'ora o venti minuti; tirare fuori i capelli, scrollare via l'umidità superflua e appenderli ad asciugare, ma non vicino al fuoco."

"Quando saranno diventati perfettamente asciutti, dividerli in ciocche contenenti da venti a trenta capelli ciascuna, secondo la finezza del capello o le indicazioni date per il disegno da lavorare. Si deve prestare attenzione a che tutti i capelli della ciocca siano della stessa lunghezza e che le ciocche siano tutte lunghe uguali."

"Annodare ciascuna estremità di ogni ciocca, quindi prendere il numero richiesto di pesi di piombo, del peso di circa tre quarti o mezza oncia ciascuno, e attaccare circa un quarto di iarda di filo da imballaggio a ciascuno di essi; adagiarli uno accanto all'altro su di un tavolo, e alle altre estremità del filo legare le ciocche di capelli già preparate, annodandole con un nodo da tessitore o da marinaio; bisogna fare molta attenzione, durante tutte queste operazioni, al fine di evitare che i capelli si aggroviglino o si scompongano".

"Le altre estremità delle ciocche devono ora essere raccolte insieme, legate saldamente con filo da impacco, quindi gommate con una malta composta da parti uguali di cera gialla e gommalacca fuse insieme e ben amalgamate, e quindi arrotolate in bastoncini per l'uso. Raggiungere infine il tavolo da lavoro e disporre le ciocche su di esso."

Era così giunto il momento di procedere seguendo la creatività o i modelli scelti, lasciandosi guidare dagli schemi.


IMMAGINE 12 - Artigiano al lavoro

IMMAGINE 13 - Alcune pagine tratte dall' A. Bernhard & Co. Catalogue, 1870 Manufacturers of Diamond Work & Ornamental Hair Jewelry che riportano modelli cui ispirarsi per creare gioielli di ogni tipo e per tutti i gusti


Non scendo nei dettagli descrittivi di ogni singolo schema perché sembrano degli autentici rompicapo solo a leggerli; mi limito a pubblicare alcune immagini e le indicazioni di partenza, sempre tratte dai medesimi numeri del Godey's Lady's Book, perché vi rendiate almeno conto di cosa erano capaci queste nostre ladies:


SCHEMA PER UN BRACCIALETTO (IMMAGINE 14) 

"Sono necessarie sedici ciocche di venticinque o trenta capelli ciascuna, a seconda della finezza dei capelli. Per questo modello le ciocche devono essere disposte a quattro e numerate."


SCHEMA PER INTRECCIARE UNA CATENA (IMMAGINE 15)

"Solo dieci ciocche, di circa venti capelli ciascuna, sono necessarie per questo schema. Devono essere disposte come illustrato dall'immagine:


SCHEMA PER UNA CATENA O UN GIROCOLLO (IMMAGINE 16)

"Per questo schema, sono necessarie sedici ciocche, ciascuna composta da circa venti capelli. Queste devono essere disposte in coppia sul piano del tavolo da lavoro, a pari distanze, e in modo che le coppie opposte siano perfettamente di rimpetto tra loro."


Ed io mi fermo qui, le ladies vittoriane erano decisamente molto più pazienti ed ingegnose di noi. Ma va detto anche che potevano permettersi di dedicare agli svaghi molto più tempo di quanto possiamo dedicarvi noi oggi, forse è questo che più ci fa difetto, purtroppo!


Ringraziandovi con tutto il cuore per avermi seguita fino a qui, 
vi do appuntamento al prossimo post,
e vi auguro ogni bene.
A presto ❤


LINKING WITH:


lunedì 23 gennaio 2017

VICTORIAN LADIES' PASTIMES: How to make wax flowers.


Avete in mente quei drawing rooms o salottini da conversazione vittoriani, riservati alle Ladies, un po' bui, con ampi pesanti tendoni festonati, spesso in velluto, che incorniciavano il balcone, con il caminetto il cui asse era ricolmo dei più svariati oggetti, i più preziosi, spesso ovattati dalla polvere rilasciata dai lumi che, ora su di un tavolino, ora su di una mensola, ora sul piano della credenza o consolle che con il camino, un paio di poltrone ed un comodo divano, ricoperto di cuscini, del vano era protagonista, illuminavano l'ambiente quando i raggi del sole avevano già reclinato il capo... 
Ecco, magari uno tipo quello nella foto sottostante...


Orbene, torniamo ad osservare il camino... sul suo asse, accanto a candelabri o tra due appliques a gas o tra due vasi identici posti ai lati, spesso facevano bella mostra di sé cupole in vetro di varie dimensioni, montate su di una base, ovale o tonda, in legno modanato, che custodivano preziose composizioni di fiori, talvolta anche di frutta, in cera, orgoglio della padrona di casa che li aveva sovente confezionati con cura con le proprie mani.

Oggi proprio di questo intendo parlarvi, di uno degli svaghi preferiti dalle Ladies appartenenti alla medio-alta borghesia vittoriana, quello della realizzazione di fiori di cera, ad imitazione di quelli reali, che costituiva non solo un modo piacevole per trascorrere il tempo, tanto da essere qualificato come una vera e propria attività ricreativa a sfondo artistico, ma costituiva altresì un modo dilettevole per approfondire le proprie conoscenze sulla botanica e su quelle specie floreali esotiche ancora poco conosciute - come ad esempio le orchidee che stavano proprio allora arrivando dall'Oriente - e per arredare con gusto la propria dimora.


Pensate che all'epoca erano in vendita in negozi specializzati non solo manuali per la realizzazione di fiori in cera, ma anche veri e propri kits 


completi di cera in fogli sottili color bianco, giallo, verde, colori in pigmenti per i petali, modelli in carta per petali e foglie, filo di ferro in matassine per gli steli, illustrazioni botaniche, piccoli attrezzi con cui modellare le parti in cera ... ma il miglior complice anche in questa attività femminile non poteva che essere il giardino di casa: bastava cogliere il fiore che più si preferiva, posarlo sul tavolo di lavoro, 'scomporlo' privandolo dei petali e delle foglie, e cercare di crearne uno il più simile possibile ad esso, ricorrendo al proprio estro e alla propria creatività, per fissare il suo tempo in quell'attimo esatto e poterlo contemplare ogni giorno; tali oggetti erano talmente apprezzati al punto da essere spesso offerti in dono come attestazione di amicizia o come presente per un matrimonio ... un soprammobile creato con amore per la nuova casa che la coppia stava progettando od arredando insieme !

Vi era che non poteva permettersi di acquistare i kit più completi e sofisticati e si fabbricava da sé in casa i fogli di cera bianca: essa veniva fusa in una tazza, quindi si prendeva un mestolo, lo si immergeva in acqua calda saponata, lo si sciacquava e si prelevava una parte della cera per versarla nella bacinella in cui era stata messa l'acqua saponata; la cera, formando un sottile strato in sospensione, veniva lasciata raffreddare ed, indurendo, diveniva una sorta di foglio rigido da cui potevano essere ricavati i petali.


E non era inusuale che della composizione facessero parte delle piccole conchiglie con cui le nostre Victorian Ladies amavano rivestire molti oggetti, da vasi a scatole, come se le conchiglie volessero rievocare una piacevole gita in una località balneare e con i riverberi madreperlati delle loro valve riportare alla mente ricordi tanto lontani da apparire quasi sfuocati ... 

Con mio grande diletto ho colto al volo l'opportunità di leggere proprio uno dei suddetti prontuari scritto da Eleonor Lever dal titolo HOW TO MAKE WAX FLOWERS.,
pubblicato negli anni '80 del 1800 in cui ammetto ho trovato istruzioni dettagliate e si direbbe davvero semplici su come confezionare fiori in cera: si prendevano i fogli di cera e vi si ritagliava sopra la sagoma del petalo del fiore che si era scelto - erano consigliati rose, garofani, peonie, camelie - dopo averlo disegnato su della semplice carta da disegno; il petalo così ritagliato veniva colorato con i pigmenti del colore che la Natura gli ha conferito semplicemente spalmandoli con delicatezza con i polpastrelli delle dita - i pennelli erano necessari solo per le foglie variegate, per esempio quelle di alcuni tipi di garofano; quindi veniva passato per alcuni istanti sopra il tubo di vetro di un lume affinché la cera fosse scaldata e fosse più semplice modellarlo ed incollarlo agli altri.

Una volta realizzata la corolla, si rivestiva con due strisce di cera verde un pezzo di filo di ferro robusto che avrebbe dovuto rappresentare lo stelo e quindi veniva aggiunto il calice, sempre ritagliato dalla cera verde, talvolta presente già fatto nel kit; era quindi la volta delle foglie che erano ricavate da due fogli di cera verde tra i quali era fatto scorrere un filo di ferro, questa volta molto sottile, a costituirne la venatura, e, aggiunti alla corolla gli stami ed il pistillo - spesso in dotazione anch'essi - il fiore poteva venire assemblato.

Per le campanule dei mughetti, altro fiore di cui le Victorian Ladies amavano circondarsi, esistevano in commercio veri e propri stampini che scavavano la cera, che in questo caso doveva essere in mattonelle.

L'autrice suggerisce anche altri utilizzi dei fiori in cera ed uno in particolare mi è rimasto in mente probabilmente perché ho intenzione di realizzarlo: ella consiglia di prendere dei ferri di cavallo ai quali appuntare i fiori di cera, possibilmente piccoli, per creare deliziosi centrotavola, oppure ornamenti per le pareti,


dei portaritratti, per esempio, da incorniciare come fossero quadretti da appendere al muro sopra il camino ( la fotografia andrebbe posta al centro del ferro di cavallo e sarebbe stato questo un dono di compleanno molto apprezzato per i tempi ).

A noi sono giunte moltissime immagini vintage che ricreano tali oggetti e che vengono inviati come biglietti beneauguranti


Se desiderate fare un salto indietro nel passato che amate e che vi fa sentire ... a casa, vi consiglio di cliccare QUI per poter avere il piccolo manuale di cui vi ho testè parlato in edizione integrale da poter leggere on-line o da scaricare e stampare per poterlo leggere forse con più comodità, altrimenti potete acquistarlo in edizione aggiornata direttamente su AMAZON, quale testo che fa parte di una collana che ristampa antichi libri da tempo fuori commercio che stiamo andando riscoprendo e rivalutando.


Come sempre vi ringrazio sentitamente per avermi seguita fin qui e, nella speranza di avervi fatto trascorrere qualche minuto dilettevole in mia compagnia, vi abbraccio caramente e vi auguro ogni bene,

a presto 💕


- picture 1 - 


Do you have in mind those drawing rooms or parlors where conversations were held only amongst Ladies during the Victorian age, a little 'dark', with large, heavy scalloped curtains, often in velvet, to the balcony, with its fireplace and with the mantel which was filled with the most varied object - which were the most precious of the whole home -, often muffled by the dust released by the lamps that, maybe on a coffee table, maybe on a shelf, maybe on a console which, with the fireplace, a couple of armchairs and a comfortable sofa, covered with pillows, of the the room was protagonist, illuminated the room when the rays of the sun had already 'bowed their head' ...

Yes, maybe one like that in the picture below ...


- picture 2 - 


Well, let's have a look back to the fireplace ... on the mantel, next to or between two gas wall lights or between two identical vases placed on each side, were often proudly displayed, under glass domes of various sizes, mounted on an oval or round wooden base, precious flower arrangements, sometimes even with fruit, made of wax, pride of the hostess who had often made them carefully with her own hands.

Today I'm going to talk to you just about this topic, that is one of the favorite pastimes of the Ladies belonging to medium-high Victorian bourgeoisie, that of making flowers with wax in imitation of the real ones, which was not only a delightful way to spend time, so to qualify it as a true recreational activity with artistic background, but also constituted a delectable way for a Lady to deepen her knowledge on the botanical and the exotic floral species still little known yet - such as the orchids that were just then coming from the East - and to furnish her home with taste.


- picture 3 - 


You have to know that at the time they were on sale in specialized stores not only manuals for making wax flowers, but also real kits


- picture 4 -


with white, yellow and green wax in thin sheets, color pigments for the petals, patterns for petals and leaves, iron wire in skeins for the stems, botanical illustrations, small tools with which to model the wax parts ... but once more the best 'help' in this feminine activity could only derive from the home garden: it was enough to pick up the flower that was the most loved, to place it on the work table, to deprive it of its petals and leaves, and to try to create one as similar as possible to it, using one's talent and creativity, to set its time precisely in that moment and be able to contemplate it each moment of the future days; these items were so popular as to be often offered as gifts as proof of friendship or as a present for a wedding ... an ornament created with love for the new house that the couple was planning or decorating together !

There was also who couldn't afford to buy the most comprehensive and sophisticated kits and had to make at home the wax sheets: white wax was melted in a cup, then you had to take a ladle, to immerse it in hot soapy water, to rinse it and then to take up a part of wax to pour into the bowl where was put soapy water; the wax, forming a thin layer in suspension, had to cool and, by hardening, it became a sort of rigid sheet from which you could derive both the petals and the leaves.


- picture 5


- picture 6


- picture 7 


It wasn't unusual that were part of the composition small shells with which our Victorian Ladies loved to upholster many objects, from vases to boxes, as if with the shells they wanted to evoke a pleasant trip to a beach resort and the reverbs of their mother-pearly valves were able to bring back memories so distant as to appear almost blurry ...

To my great delight I jumped at the chance to read one of the handbooks mentioned above written by Eleanor Lever entitled HOW TO MAKE WAX FLOWERS., published in the 80s of 1800 in which I admit I find detailed instructions and really it seems quite simple to make wax flowers: you had to take the wax sheet and then to cut on it the outline of the flower petals you had chosen - they were recommended roses, carnations, peonies, camellias - after you've drawn it on simple drawing paper or using a pattern; the petals so cut had to be colored with the pigments that Nature has given to the flower you were going to recreate by spreading them gently with the fingertips - brushes were only needed for variegated leaves, for example on certain types of carnation; then the single petal had to be passed for a few moments above the glass tube of a lamp so that the wax was heated a little and it was easier to shape the petal in the right way and paste it to the others.

Once realized the corolla, you had to cover with two strips of green wax a piece of sturdy wire that was supposed to represent the stem and then it was added to the cup, always cut out from green wax, sometimes it was found already in the kit; it was then the turn of the leaves which were formed from two sheets of green wax between which it was made slide a piece of wire, this time very thin, to constitute the grain, and, added to the corolla the stamens and pistil - often supplied too - the flower could be assembled.

For the bluebells of the lilies of the valley, another flower which Victorian Ladies loved to surround themselves with, there were real molds for digging the wax, which in this case had to be 'brick-shaped'.

The author also suggests other uses of wax flowers and one in particular has caught my mind probably because I'm going to make it for myself: she suggest to take some horseshoes to which pin the wax flowers, preferably small in this case, to create lovely centerpieces, or ornaments for the walls,


- picture 8 - 


or picture frames, to mount and hang on the wall above the fireplace (the photograph should be placed at the center of the horseshoe and this was a very popular and appreciated birthday gift for the times).

Many vintage images recreating those objects can nowadays be quite easily found in auspicious or greeting cards which can be sent by those loving this age ...


- picture 9,  picture 10 and picture 11 - Victorian style greeting cards


And if you want to jump back into the past that you love and that makes you feel ... at home, you may click HERE in order to have the little manual which I've just spoken to you about in full edition: you can read it online or download and print it to read it perhaps with more comfort, otherwise you can buy it directly in the updated edition at AMAZON as book which is part of a collection of reprinted old books, out of edition for so long, that we are going to rediscover and re-evaluating day by day.


As always, thank you very much for having followed me up to here and, in the hope to have let you spend a few minutes with pleasure, 
I embrace you all dearly and wish you all my best,


see you soon 💕


LINKING WITH